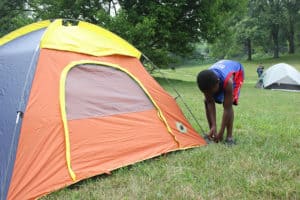
Target acquisition never gets better with a red dot sight adequately installed on your firearm. Besides helping transform newbies into sharpshooters without training, the optic will save expert shooters’ time and wallet in sports, hunting, and other activities.
So owning a firearm without one sounds quite incomplete — like owning a pen without ink. However, while using it is a cinch, sighting it in can be a tough grind. That’s where this article comes in — to serve you a full dose of how to sight in a red dot.
Read on.
Quick Navigation
Sighting In A Red Dot: The Meaning
Sighting in or zeroing a red dot means setting the points of aim and impact on the same spot. If you still don’t understand me, it means setting the red dot optic and wherever the bullet hits at the same spot. Consequently, the shooter only needs to aim the red dot on the target, and upon shooting, the bullet will hit the exact spot.
Which Is The Right Zeroing Distance?
Different gun users prefer different zeroing distances according to their expertise, the situation, and other attributes. Nevertheless, most practical shooting situations will range between zero and 25 yards. Therefore, zeroing at 15 yards will not harm. Most red dots sighted in at 15 yards will often hold their accuracy up to 25 yards without any tweaks, and that’s perfect.
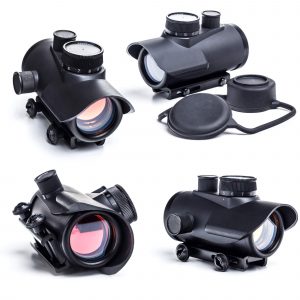
Mounting The Red Dot Optic
You need to mount the red dot optic before you can sight it in. And, the platform onto which you mount it plays a massive role in this case.
For example, AR platforms are famous for providing enough space and uniformity. Their Picatinny rails provide huge compatibility to red dot optic mounts. Otherwise, you can use other right mounting platforms.
Otherwise, there are different red dot optics with different mounting options. Besides finding the one that suits your unique firearm, you need the really good AR-15 red dot sight for the money to keep up with your budget, too.
Supported Zeroing
Supported zeroing involves resting the gun on a bench then taking a shot from that position to alleviate human error. Experts confirm that the bullet will always hit the same spot when the shot’s taken from a bench rest position. Therefore, sighting in the red dot from this position gives more accurate results, especially to the newbies.
Unsupported Zeroing
You don’t need any form of bench rest to sight in your red dot using this method. While that may not sound good to the newbies, it’s actually good news to all shooters because all practical shooting scenarios will take this form. Mostly, only expert shooters will adopt the unsupported zeroing.
Using Zeroed Iron Sights
Iron sights give you an edge over the rest while zeroing. They often already have a hint on where you should place the shot, and that’s good news for the process. All you have to do to sight in the red dot with an iron sight on your firearm is “lollipoping.”
Lollipoping involves making windage and elevation tweaks until the red dot sits right on top of the front post, after which you send a few shots with further adjustments until you achieve accuracy.
Using The Bore Sighter
With a zeroed bore sighter in the mix, zeroing can become a cinch. A bore sighter makes it possible to zero your red dot even without shooting (though it’s essential to shoot to ascertain the results). To use it for zeroing:
Start by looking down the barrel to ascertain the target’s position. The target should be at the center of the barrel in this case.
If not, make the necessary adjustments until it is.
Crane your neck to the red dot optic to see where the red dot falls. If it’s not on the target, make windage and elevation tweaks until it rests at the center of the target.
The Zeroing Process
After mounting your red dot and or bore sighter/iron sight, you need to go through a few zeroing processes for the final accurate red dot position. To start with, you’ll need to send a few shots to establish your red dot’s point of impact relative to the point of aim.
Fire four to five rounds of bullets at the target to see if they land somewhere around the target in a tight group. If they don’t land in a tight group, something must be wrong, and you need to make it right by making further adjustments. So if you’re doing it unsupported (as explained above), try it the supported way to eliminate human error.
Once the bullets land in a tight group and the point of impact is the same as the point of aim, congratulations! Otherwise, you need to tweak the windage and elevation controls to find the accuracy you’re looking for.
The controls will always make clicking sounds while you move them, and you need to know what the clicks mean. I’ll explain that in the next section. Otherwise, it’s also healthy to use estimates (as I usually do).
Appropriate Clicks
If you love some math, you’ll want to measure the difference between your point of view and the point of impact — both vertically and horizontally — before calculating the number of clicks you need to zero the red dot. I’ll guide you through the processes to see if this is the perfect method for you.
Units called MOA (minutes of adjustment) are used to estimate the number of clicks you need to make before getting the point of impact and point of aim on the same spot. One MOA usually means an inch of adjustment at 100 yards or 0.5 inches of adjustment at 50 yards, and so on.
So, if I’ve fired my shots and the difference between the point of impact and the red dot point of view is five inches to the left and two up, I need to make five windage and two elevation clicks. I hope you get the point.
After these adjustments, you need to fire the shots again to confirm your new relative points. You should continue this way until you have the points of impact and view at the same spot.
The Bottom Line
Sighting in your red dot isn’t rocket science again with this guide before your screen. The newbie-friendly steps are just a few, and I hope that we’re now on the same page. Please share the guide with friends and relatives to easily and quickly get them on the target.
Meanwhile, happy hunting!